Introduction, Commands and Tips
Introduction(1)
History(1)
DOS/Win3.11/95/98 vs. NT/ME/XP/2000(1)
Command Index(1)
Navigating DOS(2)
Tips and Tricks(2)
Network/Harware Utilities(3)
How to make and use bootable floppy disks(3)
Batch Files(4)
Creating Batch Files(4)
Batch file utilities and commands(4)
The AUTOEXEC.BAT file(4)
Types of Batch and System Files(4)
Parameters in batch files(4)
Batch File Library(5)
Subject Index(5)
Helpful DOS Links(5)
Opening DOS(Windows)
If you are using Windows 3.x, there should be an icon in the "Main" folder
for MSDOS Prompt. Click on it.
Windows 95/98: Start, Programs, MS-DOS Prompt. OR Start, Run, and type
"COMMAND"
Windows NT/XP/2K: Start, Programs, MS-DOS Prompt. OR Start, Run, and type
"CMD"
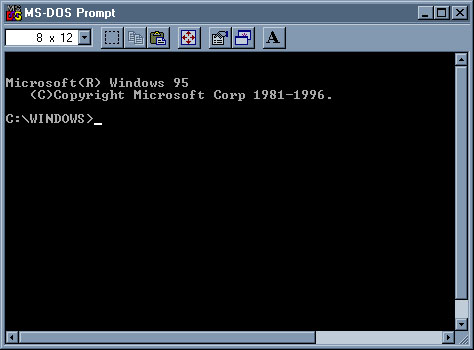
Now, a black window should appear with prompt like this: "C:\WINDOWS>".
If you are using NT it will only say "C:\".
It should look like this:
If the DOS window fills up the whole screen, type EXIT,
then right-click on the MS-DOS Icon, click "Properties" and select the
"Screen" tab, click on "Window" instead of "Full-screen", click on "Ok"
and then reopen the DOS window.
Opening DOS in IBM's OS/2
If you are using the OS/2 platform, follow these instructions for opening a DOS session.
1. Open the "OS/2 System" folder.
2. Open the "Command Prompts" folder.
3. Click on the "DOS Window" icon.
Open a command line in NT/2x
Go to Start, Run, type "COMMAND". In previous versions this was done by entering CMD. In some versions
of NT entering CMD may invoke previous versions of DOS.
In some versions of WIN2x, CMD will open a command line with
spaces in the directory name, COMMAND will open the window with the
old 8 character limit.
NT/2x Directory System
NT uses user profiles. Each user will have
different Desktop and My Documents folders under
different names. There is no directory called "Windows", but there
is one called "WINNT." Most NT system files will be found in
C:\WINNT\System or C:\WINNT\System32. In some cases
%SystemRoot% is used to address the system drive
regardless of whether it is Windows or WINNT.
The different user set-ups are in the C:\Documents and settings
or C:\DOCUME~1. In this directory there will be
a different folder for each user who accesses the machine. You may
also see Administrator, Default User, All Users and some other funny
virtual user folders. Each folder will have its own Desktop, Start
Menu, My Documents, Cookies, Favorites and whatever directory structure
the user has made beneath. Programs everyone access are
usually found in C:\program files or C:\progra~1(same as Windows).
Navigating DOS
For those who have never used a command line envornment, it can be a little confusing and frustraiting.
But don't worry. It's still confusing and frustraiting for people who have been doing it for years.
Start by using the DIR command.
DIR
At the C:\WINDOWS> prompt type DIR for "directory". A list of
files should fly up the screen faster than you can read. When the prompt comes
up again type DIR/P. This will allow the list to be read one
page at a time. Hit enter a few times to get to the end of the list and back
to the prompt. DIR is a program that reads scans the current directory and
lists all the files. /P is called a switch. The P stands for "page"
or "pause"(I can never find out which). When you type DIR/P you are passing
/P to the program DIR as a Parameter. You can pass
other parameters to DIR. Try typing DIR/W, this puts the file
list in "wide" format. Now try this, DIR R*.*. This will display all the
files that begin with the letter R. The "*.*" part of the parameter is called a wildcard.
A wildcard tells the program that anything after the letter R does not matter. Try this one,
DIR *.*EXE. This will display all the files with the .EXE extension.
DIR will display all the files, directories, file sizes, time and date or creation.
DIR|MORE will show you the list and prompt to continue. Similar to DIR/P.
DIR/B for bare or brief, shows only the filenames and their extensions.
8 Character Limits
In early systems there was an 8 character limit on file names and directory names. Directory names and file names
also could not contain spaces. This scheme still plays a big role in navigating DOS. The standard
Windows folder "Program Files" is called "PROGRA~1." The general rule is to count 6 characters in: "PROGRA" then
add the ~ and a number. Since we may have multiple files or directories with similar names, we have numbers at the
end of the 8 character name. The number is determined by which file or directory was created first. Since
Program Files is a built-in directory it gets a 1. If you create a new directory called "Programs" the DOS name
will be "PROGRA~2". To view the DOS names, use this command: DIR/X
In some Windows versions you can open a DOS prompt in specific directory by first navigating to it through Windows Explorer,
then going to Start, Run, CMD or COMMAND. In most cases it will open the default
PATH directory.
For a full list of DIR possibilities enter DIR/? at the command prompt.
Switches
In DIR you placed various slashes and letters after the commands. These are "switches" that modify
the behavior of a command. Every command has a different set of switches. A "/A" may mean something
for a command and something totally different for another. Sometimes a switch may be preceded by a -
instead of a /, sometimes there is no special character at all. For each command look at the help file
to see the list of valid switches. You may view the help file of any command by typing the command followed
by /? or /HELP in older versions.
CD
Now for a different command. Type in CD.. this should set the prompt to "C:\",
meaning that you are now in the root directory C:, C:\WINDOWS is a sub-directory of C:.
CD stands for "Change Directory", a program that allows you to move around the
directory structure. The .. parameter you passed to program CD tells
the program to move up one directory level. Now pass a different parameter, type CD
C:\WINDOWS\DESKTOP
. This will change your directory level to the Desktop folder. Type DIR/P
and look at the file listing briefly. Now minimize the DOS window and look at your Windows Desktop.
You should see all the same files. Most of the file extensions will be .LNK meaning
that they are shortcuts. CD will allow you navigate through the whole directory structure.
You may also look at floppy disks: CD A:(sometimes B: also), or CDROMs: CD
D:(sometimes E:).
CD.. puts you in the parent directory(up one level)
CD. refers to the current directory
As stated in the DIR section there is an 8 character limit for directory names for many DOS systems. When
using CD to move to a directory with a long name be sure to know the DOS name. Example:
CD progra~1 to go to "program files" if you are in the root of C:\, otherwise use
CD C:\progra~1 from any other directory.
Using drive letters as commands
To switch from one drive to another simply type the drive letter. Example: D: or A:.
For removable media(floppy, CDROM) you must have the media in the drive to move to it.
PATH
PATH sets a directory search order. This is useful in many
respects. For example, if you are using a
boot disk you are running
the DOS operating system from that disk and the more complex commands will only
run if you specify the location. If you are at the A: prompt and want to run a
command on C: you must type FIND C:\myfile to use the
FIND
command, or if you are in C: you would need to type A:\FIND C:\myfile.
To make things easier, type PATH A:\ at the C:\ prompt. This way
the operating system will know to access A: for all the commands.
Some installation programs(especially development environments) will add a line to the
AUTOEXEC.BAT
like PATH=%PATH%;C:\MSSQL7\BINN this allows programming
bins to be accessed from anywhere on the drive.
DOSKEY
Type in DOSKEY at the prompt, the DOSKEY program is now loaded.
DOSKEY
keeps a history of all the commands you type in each session so you can reuse them without typing them
in
over and over again. You may view your history by hitting the Up-arrow on your keypad.
DOSKEY is active in NT by default, but not in Win2K. Consitency is not one of
Microsoft's strong points.
DEL
DEL is the Delete program in DOS. DEL allows you to delete files. For example,
typing DEL TEMP.TMP will delete the file temp.tmp. Warning! Using
the DEL command in DOS is not like deleting in Windows,
there is no Recycle Bin, the files are gone. If you accidentally delete
systems files, you are going to have some problems. Only delete files that you are sure about.
EDIT
At the command prompt type EDIT. The screen should turn blue with a menu bar at the top.
This is the DOS EDIT program and it can come in handy. Click on the "File" menu then
click "Exit". You should be back at the prompt. With EDIT you can view and alter just
about any file on your system, even ones Windows will not allow you to. Warning!
Altering system or program files in EDIT can have serious consequences. Make copies of any
file you edit and work on the copy so the original remains intact incase you screw up. Believe
me, making copies is much easier that reloading your operating system. This time EDIT
TEST.TXT this will open the editor and create a text file called "test.txt". Type in some random
text. For a moment stop using your mouse. Press <-Alt-> and then the Down-arrow on your key pad. This
will dropdown the "File" menu. This is how navigation was done before the mouse. Learning how to use the
keyboard for navigation can be useful something goes wrong with your computer or your mouse wont work.
Save your work and exit the editor. In some early versions of DOS it was called "EDLIN." If EDIT doesn't
work try EDLIN instead.
REN
REN is short for "rename" and is used to rename files. Warning!
Renaming files is as bad as deleting or altering them. Renaming system files can cause errors since the
files point to each other. Type in REN TEST.TXT TEST.DOC. This will rename the text
file you just created as an MSWord Document. You may now open Word and edit the TEST file like any
other Word file. Type REN TEST.DOC MYFILE.DOC. This renames the file as "myfile" but
it is still an MSWord document.
TYPE
TYPE is a program that will show the contents of a file without opening it for
editing. Try entering TYPE MYFILE.DOC and you should see the contents of the file
you created earlier.
MORE
Earlier you learned how to use the /p switch with the DIR command. There is
another device which allows you to view directories and file contents a page at a time:
MORE.
Use the previous command to demonstrate. at the prompt enter TYPE MYFILE.DOC |MORE and hit < enter >.
If the file you selected it several pages long, DOS will display the first page and then at the bottom
of the screen you will see --more--. DOS is waiting for you to continue. Hit < enter > and
it will scroll through the next page.
EXIT
Type this at the prompt to close the current DOS session.
FIND
This is a very usefull tool for searching files for strings(text). If you have lost a file or renamed
a file and cannot remember what the name was, you can use FIND to locate it. For example if
your name is Joe and the missing file has your name in it, enter FIND "Joe" at the prompt.
DOS will search the current directory for any file containing the string "Joe."
MD or MKDIR
Use this to create and name your own DOS/Windows directory.
MD test, creates a directory named "test"
RD or RMDIR
Use this to remove directories.
RD test
MOVE
Moves files from one location to another, as opposed to copying.
MOVE test.txt A:\, moves the file "test.txt" from the current
directory to the A: drive.
COPY
Copies files.
COPY C:\myfile.txt A:\myfile.txt
|
XCOPY
"Extended" COPY. Copies files from one or more subdirectories.
Slightly more powerful than COPY. XCOPY has all the same functions as COPY but these
switches also available:
/D:m-d-y Copies files changed on or after the specified date.
If no date is given, copies only those files whose
source time is newer than the destination time.
/EXCLUDE:file1[+file2][+file3]...
Specifies a list of files containing strings. When any of the
strings match any part of the absolute path of the file to be
copied, that file will be excluded from being copied. For
example, specifying a string like \obj\ or .obj will exclude
all files underneath the directory obj or all files with the
.obj extension respectively.
/P Prompts you before creating each destination file.
/S Copies directories and subdirectories except empty ones.
/E Copies directories and subdirectories, including empty ones.
Same as /S /E. May be used to modify /T.
/W Prompts you to press a key before copying.
/C Continues copying even if errors occur.
/I If destination does not exist and copying more than one file,
assumes that destination must be a directory.
/Q Does not display file names while copying.
/F Displays full source and destination file names while copying.
/L Displays files that would be copied.
/H Copies hidden and system files also.
/R Overwrites read-only files.
/T Creates directory structure, but does not copy files. Does not
include empty directories or subdirectories. /T /E includes
empty directories and subdirectories.
/U Copies only files that already exist in destination.
/K Copies attributes. Normal Xcopy will reset read-only attributes.
/O Copies file ownership and ACL information.
/X Copies file audit settings (implies /O).
CLS
Clears the screen. Clears previous output in the DOS window. Helps close out batch processes.
SET
Shows the environment values and allows them to be changed.
See more in Parameters
FORMAT
Formats a disk for use
Genericaly formats a disk for storage use. Most disks are
sold pre-formated, nowadays, but the version may not always be
compatable with your operating system.
Formats a disk in the B drive.
Places a copy of the operating system on the disk so it is "bootable".
Totally erases disk, regardless of what was on it before.
UNFORMAT
Recovers a formatted disk.
LABEL
Use for labeling a disk or changing the present label of a disk. To
see what the current label is use VOL
ATTRIB
There are many "hidden" files on your system. Some are hidden for a good reason, they are system
files that programmers did not want users to delete accidentally. Deleting these files my make your
computer inoperable. HOWEVER! Hidden files may also be nasty virii or a corrupted file that is causing
problems in your computer. Maybe something you downloaded from the Internet is popping-up all the
time and causing your browser or system to crash. You look for the file but it's not there, or it is
there but you can't delete it: "Access Denied." Access deined! It's my F!ng computer! Fear not
my friend! ATTRIB stands for file attributes. Files my be designated as hidden,
archive,
system or read-only. There are only four and it's easy ro remember because it might give you
RASH.
Open a DOS prompt and navigate to the C:\> root directory. Type "DIR" and you will get a list of files
and directories. Type "ATTRIB" and you will get a similar list, but it is much longer. Type "DIR IO.SYS"
or
"DIR MSDOS.SYS" and it will probably result in this:
Type in "ATTRIB MSDOS.SYS" and you'll see this:
A SHR MSDOS.SYS C:\MSDOS.SYS
|
Gee, all of the sudden it's there?
This is interesting. Go to the C:\WINDOWS\ directory and do an ATTRIB
on a file called "user.da0". This is hidden file that you should be
aware of. Why? Because inside is a tiny databse of everything you do.
Every file you open, every application you use, every website you visit.
You cannot delete or rename a hidden file. To change the attributes, use the
following syntax:
ATTRIB -R -A -S -H USER.DA0
|
Now you may delete or rename to your heart's content.
To turn attributes on, let us say that you want to conceal
files on your PC from the casual snooper, or from the Boss.
Use this syntax:
ATTRIB +R +A +S +H filename
|
- will turn the attributes off, + will turn them on.
DOSSHELL
A shell interface that makes DOS easier to use. This is not
part of most current versions of DOS and would have to be loaded
seperately.
KEYB and NLSFUNC
These are DOS programs for international language support, they
are not available on most PCs sold in the U.S. and must be loaded
specially. They are present in version sold in other countries.
KEYB changes the keyboard layout to match foreign keyboard designs.
Last time I checked it supported 18 languages. Paramaters of this
command alter the configuration of KEYBOARD.SYS.
NLSFUNC is used to load a specific language file, usually
COUNTRY.SYS.
Both of these commands have been replaced by GUI programs.
More information
NUMLOCK
Sets the the NUM LOCK on or off. Cannot be run from the command line, must
be in a boot batch file like CONFIG.SYS
Changing the DOS prompt. The default DOS prompt is:
diskletter:\directoryname>, example: C:\WINDOWS>. But
there are many other options available.
Enter PROMPT $p$g at the command-line for the standard prompt.
Try these others:
PROMPT Sets it to "C>"(which is the old pre-windows prompt)
PROMPT $t Makes the current time(military) your prompt
PROMPT $d Makes the current date your prompt
PROMPT $v Makes the Windows Version your prompt
PROMPT $q Prompt is "="
PROMPT $b Prompt is "|"
PROMPT $e Prompt is "<-"
PROMPT $l Prompt is "<"
PROMPT $_ Prompt is nothing(can be scary)
PROMPT $n Makes the current drive letter your prompt
PROMPT $a Opens up a whole host of options. For example,
PROMPT $aHello Jerk makes the prompt: Hello Jerk. You could
have a user's name as the prompt: PROMPT $aTeddy Roosevelt. Combinations
are also possible: PROMPT $aGeorge $t makes the prompt
a user's name an the current time.
If you want a particular prompt to be permanent, insert one of these
lines into you AUTOEXEC.BAT file.
Make your DOS prompt look like the Lost hatch
terminal:
PROMPT=$g:
COLOR=0a
OR
PROMPT=$g:$s4$s8$s15$s16$s23$s42
COLOR=0a
More recent DOS/Windows versions
$A = &
$B = |
$C = (
$D = Current date
$E = Left arrow
$F = )
$G = >
$H = Backspace
$L = <
$N = Current drive
$P = Current drive and path
$Q = =
$S = space
$T = Current time
$V = Windows 2000 version number
$_ = Carriage return and linefeed
$$ = $
More: 1,
2
Creates a graphic map of directories and sub directories.
For example, use a folder like C:\WINDOWS\TEMP or C:\WINNT\TEMP so you
wont be overwhelmed while testing it. Typing TREE in this directory
might produce:
C:.
|-----ms
|-----sms
|-----logs
|
MS is a subdirectory of TEMP, SMS is a subdirectory of MS, LOGS is a subdirectory or SMS.
TREE/F will show file names in addition to directories.
To send the output to text file: TREE/A>mymap.txt. The /A will use simple formatting
that will read better in the output file.
More
Tips, Tricks and Other DOS topics
< Ctrl > C
To end a process that is running in DOS, hit the control key, "< Ctrl >", and the "C" key at the same
time. This
will end the process without closing the session.
The DOS window has taken over my screen!
If you are using any version of Windows, type < Alt > and < Tab > at the same time. This will toggle the
DOS window into
the Windows task bar. From there, right-click on the DOS box in the taskbar and click on
"Properties" then the "Screen"
tab. You should change the screen selection from "Full-screen" to "Window."
What is redirection? Typically output from DOS commands is displayed to the screen unless
otherwise specified. It is possible to send output to a file, a printer and other devices. Devices
are the ports on your PC where data move in and out of memory. Your monitor port is a device, the keyboard and mouse
are devices. Serial and parallel ports where printers and other external components plug in are devices.
Forcing files to the printer:
TYPE filename>LPT1
LPT1 is the device name for the printer port. It also may be
PRN, LPT2, or LPT3
(This may only work if your printer is directly attatched to you LPT port, it may not work on a
network)
The ">" refers to the direction of the standard output.
TYPE mydoc.txt>LPT1 will send the document right to the printer.
The above is generally for local printers(meaning connected to the ports
on the back of your machine). If you are printing on a network, try using the
location of the printer with these commands. Example:
TYPE filename>\\severname\printername
So if my printer server was called "NETPRINT" and the printer was called "HPLASER1", the
line would be:
TYPE myfile.txt>\\NETPRINT\HPLASER1
Forcing files to a file:
TYPE filename1>filename2
This will dynamicaly move the contents of one file new file, creating and naming
the new file at the same time.
TYPE mydoc.txt>mydoc.doc will create a new document called "mydoc.doc" with the contents of
"mydoc.txt"
You may also use >> . The difference is that > will overwrite
>> will append.
< Redirect input, used with SORT.
More on SORT.
>&
<&
CRTL+P Copies all subsequent input chars to printer
CRTL+S Suspend further output to a device
CRTL+Z Marks end of a file or stream
DOS Devices
AUX - Auxiliary device, usually first serial port
CLOCK$ - Real-time system clock
COM1 - COM4 - Serial ports(asynchronous)
CON - Keyboard and monitor
LPT1 - LPT4
NUL - The "bit-bucket", discards output and provides no input.
PRN - First parallel port, often a printer
The typical difference between COM and LTP is that COM devices may go in
two directions(I/O) while LPT is usually only for output.
Why use NUL? Forcing output to NUL ensures it is discarded. Programs usually
have some kind of output, generally displayed on the screen. program.exe > output.txt
will force the output to a file. program.exe > NUL will force the output to "nowhere."
Print a directory listing with LTP1
More Tips...
Windows Tips
